Monday, April 25, 2011

Confused Tom

Roasted Turkey Breast


Poor Tom Turkey was confused this past weekend.  With all the cold weather lately, who can really blame him?  But the poor bird arrived in our home this holiday weekend instead of Miss Piggy.  We didn’t want to embarrass the befuddled bird, so we smiled, thanked him for coming and made him instead.  Well…his breast really.  I’m sure the rest of him went to great use.  Ever have a smoked turkey leg?  We did at Christmas Candylane one year…YUM!  Yes, I’m sure the legs went to a great cause such as that!  But we only had the breast, so we roasted it and were wowed with the results!  What a happy outcome to the poor fowl’s confusion!  Here is what we did:

Ingredients:
5 ½ Pound turkey breast (if yours is larger, just increase the butter mixture a little)
3 Tablespoons butter, softened (I use unsalted)
7 – 10 Sprigs fresh thyme
2 Cloves garlic, minced
4 Tablespoons Dijon, divided
2 Tablespoons lemon juice, divided
1 Onion, quartered
3 Ribs celery, cut into large sticks
1 ½ Cups chicken stock
Salt and Pepper

Step 1
The first step is super easy - preheat the oven to 325 degrees.  See?  How easy was that?  It will get a little more involved now…but will still be easy!

Step 2


We need to prepare the butter mixture that will be spread under the skin.  Begin by putting the softened butter into a bowl.  Remove the thyme leaves from the stems and add them to the bowl.  Mince the garlic and add that too.  Finally, add 2 tablespoons of Dijon, 1 Tablespoon of lemon juice and a nice amount of salt and pepper.  Mix to combine.

Step 3


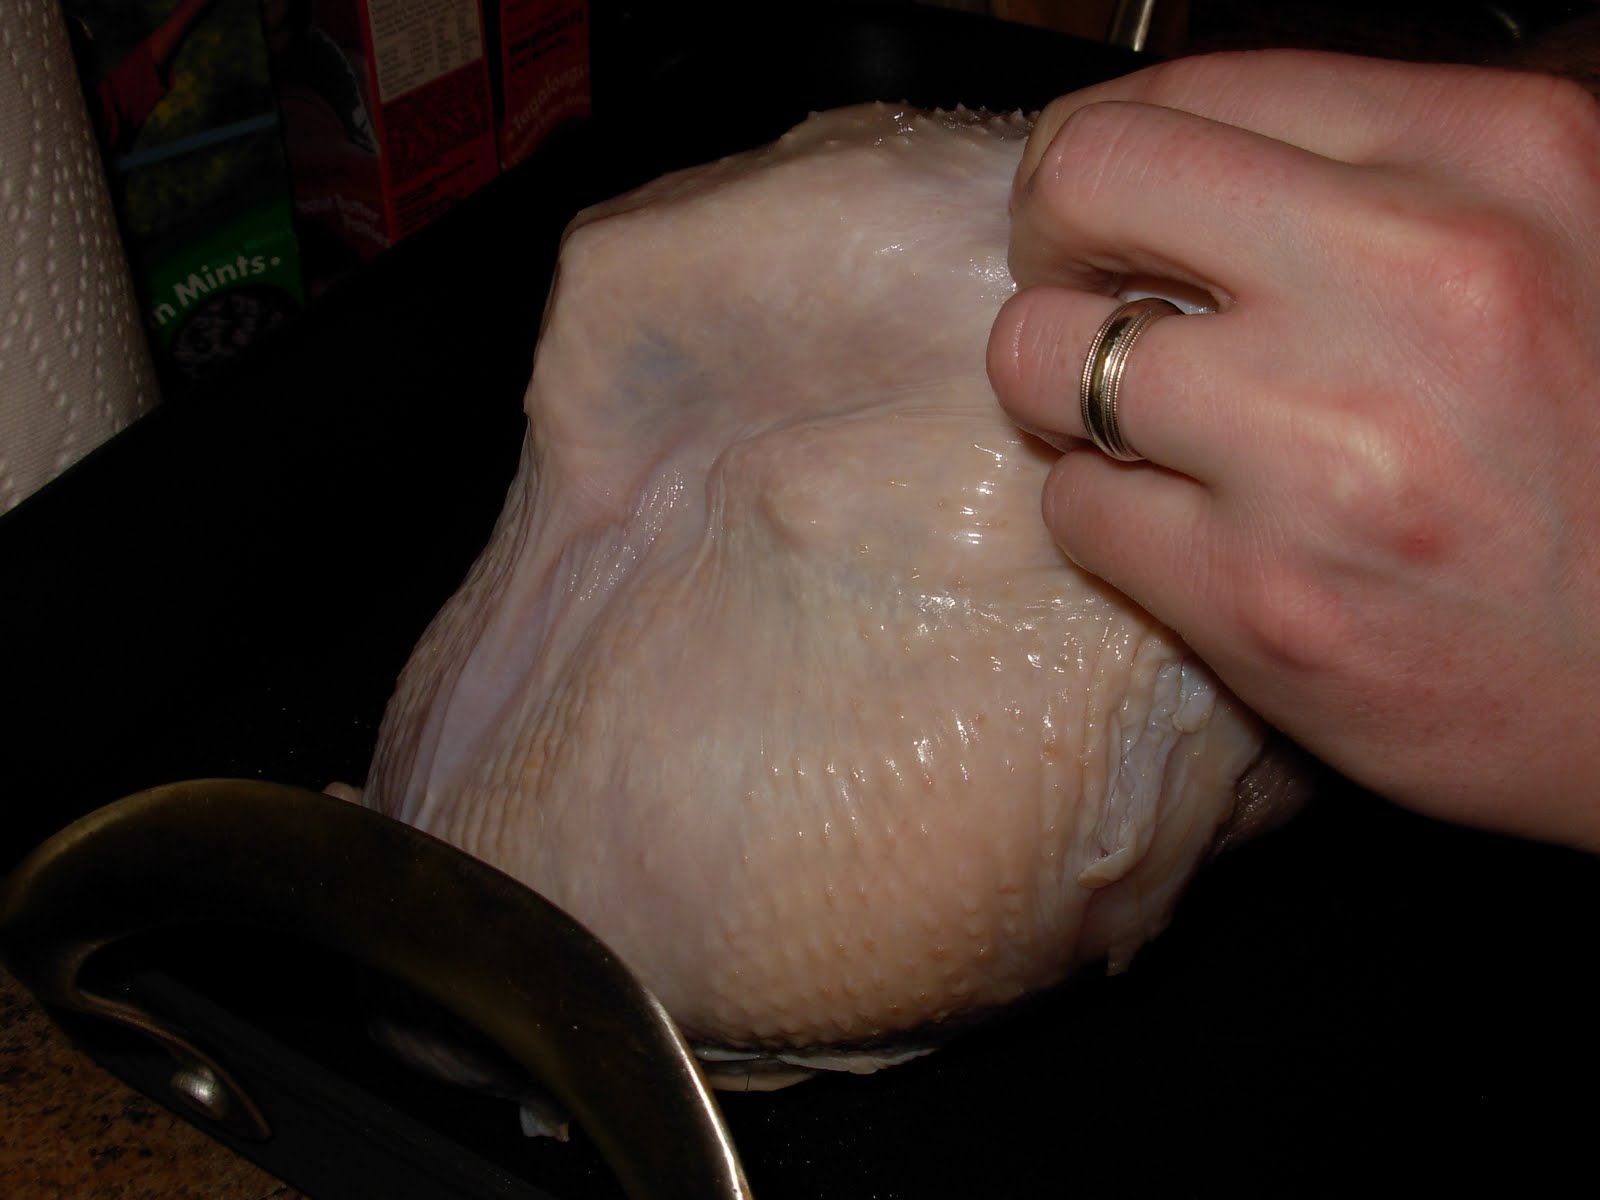
Now the skin of the breast needs to be separated from the flesh.  This is where my husband comes in because I have freakishly large hands!  He just works his hands between the skin and the flesh until there is a nice, large cavity over the breast meat.  Then spread the butter mixture on the breast meat, but under that skin.  This ensures flavorful meat!  If you just spread the mixture on top of the skin, the skin will taste delicious, but the meat will not be seasoned or flavored.


Step 4


Quarter the onion and chop the celery into large sticks.  Place the turkey into a roasting pan, breast meat up.  I used the onion quarters and celery to help keep it securely upright.  Then pour the broth, remaining Dijon (2 Tbsp.) and lemon juice (1 Tbsp.) into the pan, around the turkey.  Whisk them to combine, briefly.  Add a nice sprinkling of salt and pepper to the top of the skin.  Then place the bird in the oven.

Step 5
We roasted it for 1 ¼ hours.  Then, I turned the heat up to 350 degrees for 15 minutes, just get the skin a little more browned.  Make sure you check the meat temperature before you removed it from the oven.  I look for 160 degrees because it will get to the desired 165 while it’s resting, covered in foil, for 15 minutes.  I find if I roast it to 165 and then remove it, the turkey is dry.

Step 6


After the turkey has roasted, it’s time to carve!  Make the horizontal and vertical cuts on each side of the breast bone, to remove both breasts from the bird.  Then slice it against the grain.  I don’t know why, but it stays more juicy and tender when sliced against, instead of with, the grain.  Serve the turkey with some of the pan juices spooned on top of the meat.

Enjoy!

Gastronome's Note:  I have a nonstick roasting pan, so it cleaned easily.  If yours is not nonstick, you may want to line the roasting pan with aluminum foil for easier clean up.

Monday, April 18, 2011

Devilish Eggs


Devilish Eggs
It’s that time of year!  The hard boiled eggs pile up in anticipation of some festive coloring.  My body seems to be perfectly in tune with the season because a deviled egg craving hit this weekend…and I listened to that craving.  I like big flavor in a deviled egg.  In my opinion, a great deviled egg has bold flavors that work with the richness of the yolk to make something almost decadent.  The ho-hum flavor of most potluck deviled eggs just doesn’t work for me.  As my husband put it, when he eats most deviled eggs, one is enough.  These flavor-packed deviled eggs have him reaching for more.  Give them a try – and feel free to adapt so they tickle your own taste buds!

Ingredients
6 Eggs
¼ Cup mayonnaise (I like Hellman’s Light mayo – less fat, but still really thick and creamy)
1 Tablespoon Dijon
1 Tablespoon prepared horseradish, drained after measuring
¼ Cup cheddar cheese, grated
Salt and Pepper
1 scallion, light and dark green parts
Paprika

Step 1
If your eggs aren’t already hard boiled, we need to get them there!  It seems everyone has their own method for hard boiling the perfect egg.  This is what I did and the yolks were all a beautiful yellow – no green rings.  But use your own tried and true method if you rather!  I put the six eggs in a pot and covered them with cold water until the water was about an inch over the eggs.  I put the pot over medium heat and brought it to a simmer.  Then I covered the pot and took it off the heat.  I let them sit for 9 minutes.  Then I drained the water and rinsed them with cold water.  When they were cool, they were ready to peel.  I tapped them my counted until the shell was cracked all around the egg and then peeled it.  It should come off rather easily.  Now they are ready to be deviled!


Step 2
Slice your hard boiled eggs in half.  Pop the yolks into a bowl.  Add the Dijon, horseradish, cheddar, salt and pepper.  You may want to add the horseradish and Dijon 1 teaspoon at a time.  As I mentioned, we like BIG flavor in our deviled eggs…your taste buds may beg to differ.  So start less and work your way to your perfect filling flavor!  Mix the ingredients together until it is a smooth, creamy mixture.


Step 3
Time to fill those little empty vessels!  They are begging for that rich, tangy mixture and it’s time to acquiesce to their request.  I piped the filling in with a star tip.  You could also put the filling in a zipper bag and cut a hole in the end for easy piping.  Or you can just spoon the filling into the egg.  It doesn’t matter how it gets there…it just needs to get there!


Step 4
Dust the filled eggs with paprika.  What can I say…it’s classic on deviled eggs.  Chop a scallion and scatter the light green and dark green parts on the eggs (the white of a scallion will overpower the flavors of the egg).


Enjoy!  Have fun with your deviled eggs.  Put your own favorite ingredients in the filling...there are no rules.  Make your own devilish variety!

Wednesday, April 6, 2011

Turkey Chili Soup


This dish was created at the grocery store.  When walking into the store this past weekend, we were trying to figure out what we wanted to make for Sunday dinner…we wanted something healthful that would provide some leftovers to eat on busy weeknights.  We thought about a white chicken chili we make with chicken breasts, but decided ground turkey sounded more “chili-ish”.  Without a recipe in hand, we walked through the store and selected ingredients we thought sounded good.  Thus, our Turkey Chili Soup was born.  And what a delicious result it was!  Take a look…

Ingredients
Olive oil
1 Pound ground turkey (I like using ground turkey breast)
1 Large onion, large diced
2 Jalapeno peppers, cleaned and small diced
1 Pobalano pepper, cleaned and large diced
1 Cup corn (I used frozen yellow)
3 (15 oz) cans beans (I used 2 cannellini and 1 pinto)
1 Tablespoon cumin
1 Tablespoon oregano
2 Teaspoons black pepper
½ Teaspoon crushed red pepper
6 ½ Cups chicken broth (I used unsalted stock)
Kosher salt to taste
1 Bunch Swiss chard, chopped
Sour cream, optional
Cheddar cheese, shredded, optional

Gastronome's Note:  We used a slow cooker, but you could easily make this on the stove.

Step 1
Begin, like I always do, by prepping the vegetables.  Large dice the onion.  When it comes to the peppers though, please be careful, especially the jalapenos!  I used gloves because of an incident I had the first time I chopped jalapenos.  It was for my sister’s graduation party and I was cleaning and dicing about 50 of them…gloveless.  My hands burned for days and the contacts I was wearing that day had to be tossed because they burned my eyes when I tried using them again!  So please, use caution!  Don’t be like me!  Remove as much of the veins and seeds as you like…that’s where the heat lives…so make it to your taste.  Small dice the jalapenos and large dice the poblano.

Step 2
Heat a medium sized saute pan over medium high heat.  Add some olive oil.  When it is hot, add the turkey and brown it.  It you have any excess fat when you are finished browning, just drain it off.

Step 3
Put the browned turkey, onion, peppers, corn, cumin, oregano, black pepper, red pepper and chicken broth in the slow cooker.  Drain and rinse the beans and then add them.  Add salt to taste.  Cover and turn to high heat for four hours.

Step 4
It should be bubbling and ever so fragrant by now.  Chop your Swiss chard and add it to the slow cooker.  It will begin wilting immediately when you stir it into the soup.  Let it heat through just a minute or two.  Then dish it up…doesn’t it look so healthful?!


Of course, I can’t stop there…I just had to reduce the low fat factor by adding some sour cream and shredded cheese…but oh how yummy it was!!!! J