Monday, March 5, 2012

Lentil and Sausage Soup

Lentil and Sausage Soup


For months, I had been dreaming of lentil soup.  I knew in order for these dreams to end, I had to make some variation, but wanted to find just the right recipe.  I checked recipe after recipe, had ideas of adaptations I wanted to make, but couldn’t find just the right twist.  I read through each recipe, tasting in my mind what the finished product would be, and couldn’t find one with an ingredient that was just different enough to make it interesting.  That is, until I came upon Ina Garten’s Lentil Sausage Soup.  Sausage.  Kielbasa to be exact.  That made me go “hmm.”  That was exactly what I was looking for!  I love those aha moments!  Leave it to Ina Garten to have exactly what I wanted.

We made the soup, with some additions of our own, and absolutely loved it!  When it says French green lentils, please do try to find them.  Regular green lentils lose their shape and become more like split peas.  It would still be delicious, but I love that the French lentils hold their shape.  Just my two cents. J

The bonus is, this soup makes a lot of meals, so some can be frozen for later…or even better, some can be shared with friends!  Enjoy with a crusty baguette and you have a delicious, healthful meal.

Ingredients

1 Pound French green lentils
¼ Cup olive oil
4 Cups yellow onions, diced (2 HUGE onions did the trick for me)
4 Cups leeks, washed and chopped, white and light green parts (2 leeks)
1 Tablespoon garlic, minced
1 Tablespoon salt
1 ½ Teaspoons black pepper
1 Teaspoon thyme, dried, or 1 Tablespoon thyme, fresh
1 Teaspoon cumin
3 Cups celery, diced (8 stalks)
4 Carrots, diced
2 Parsnips, diced
3 Quarts chicken stock
2 Tablespoons tomato paste
1 28 oz. Can whole tomatoes, crushed by hand, with juice
1 Pound kielbasa, cut in half lengthwise and sliced (I used turkey kielbasa to reduce fat)
1/4 Teaspoon crushed red pepper
2 Tablespoons red wine vinegar
Parmesan rind (if you have one on hand, which I did and decided to toss into the soup!)

Step 1
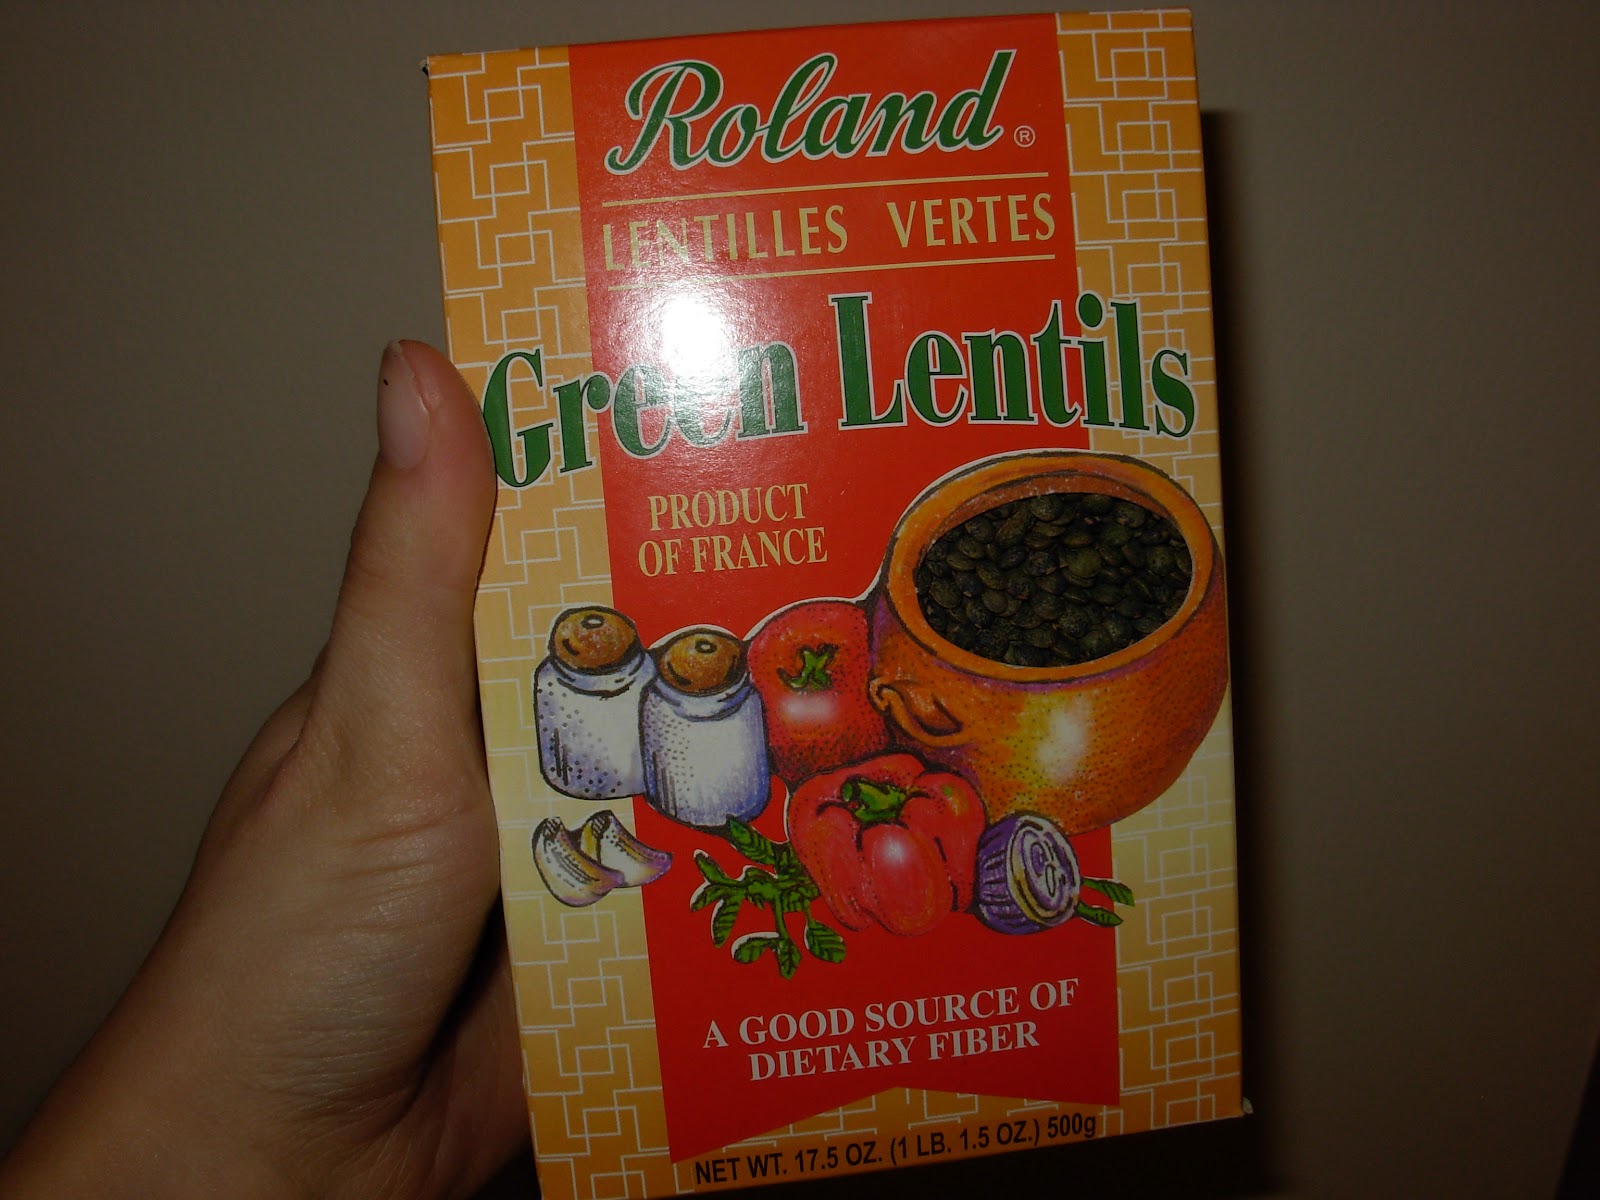

In a large bowl, cover the lentils with boiling water and allow them to sit for 15 minutes.  Then drain them and set them aside for later.


Step 2


While the lentils are sitting, begin chopping your onions, leeks (slice in half and clean between the layers well…lots of sand in there!) and garlic.  Then get a large stockpot heating over medium heat.  Add the olive oil. 


When it is hot, add the onions, leeks, garlic, salt, pepper, thyme, crushed red peppers and cumin.  Sauté the mixture for about 15 minutes, or until the vegetables are tender.

Step 3


While the mixture is sautéing (be sure to stir occasionally), chop your celery, carrots and parsnips.  It might take longer than your onion mixture will need to cook.  Just take it off the heat when it is tender and continue chopping your veggies. 


When they are all ready, add them to the onion mixture and sauté for another 10 minutes.

Step 4


While the veggies sauté, open your can of whole tomatoes and crush them by hand, with all the juices.  When the veggies are ready, add the chicken stock, tomato paste, tomatoes, lentils (drained), and Parmesan rind.  Bring it to a boil, covered.  Then reduce the heat to simmer and remove the lid.  Allow the soup to simmer for 1 hour, stirring occasionally.

Step 5

When the hour is almost over, slice the sausage in half lengthwise and then slice into 1/3 inch pieces.  Check the soup’s seasoning level when the hour is over.  Add more salt, pepper, crushed red pepper, thyme or cumin according to your own taste. 


Then remove the Parmesan rind and add the sausage and red wine vinegar.  Simmer for another 5 – 10 minutes, just to heat the kielbasa.


To serve, I topped it with Parmesan cheese.  Bon appetite!

Gastronome's Note:  This soup can easily be made vegetarian!  Just substitute the chicken stock for vegetable stock and leave out the kielbasa.

Thursday, February 16, 2012

White Chicken Chili

White Chicken Chili


I was watching American Beauty the other day…I know, I know, it’s an eccentric kind of movie.  But, I was completely struck by one of Ricky’s lines when he is showing his movies to Jane.  It’s during the beautiful little film of the bag being tossed by the wind that Ricky says:

"It was one of those days when it’s a minute away from snowing and there’s electricity in the air, you can almost hear it.  Right?  And this bag was just dancing with me.  Like a kid begging me to play with it.  For fifteen minutes.  That’s the day I realized that there was this entire life behind things, and this incredibly benevolent force wanted me to know there was no reason to be afraid, ever.  Video’s a poor excuse, I know.  But it helps me remember…I need to remember…Sometimes there’s so much beauty in the world, I feel like I can’t take it, and my heart is just going to cave in."

Wow.  That line, accompanied with the video of the grocery bag dancing in the wind, up, down, in circles, got to me.  Beauty, signs from God of love and life, are all around if we slow down and let ourselves experience them.  So before we get to the recipe, I want to challenge all of us to watch for beauty today as we go about our normal lives…it is there, I guarantee it.

For me, one of the greatest signs of beauty is in food.  The way simple items from this planet come together and create something delectable.  This dish is just that…simple.  It is simple, healthy and hearty, yet is tastes so good!  I adore chicken chili; actually, I adore chili of any variety.  This is a recipe I’ve been using for years, but I decided to tweak it a little and see if it could be made better.  It could indeed!  I loved the results; I hope you do too!

Ingredients
3 Cans cannellini beans, drained and rinsed (or navy beans, or any other white bean)
5 Cups chicken stock
Olive oil
2 Cloves garlic, minced
1 Onion, diced
2 Poblano peppers, seeded and diced
1 Anaheim pepper, seeded and diced
2 Boneless, skinless chicken breasts, cut into ¾ inch cubes
¾ Cup corn kernels
1 Tablespoon cumin
1 Tablespoon oregano
½ Teaspoon crushed red pepper flakes
Salt and pepper
Sour cream
Shredded cheddar cheese
Scallions

Step 1


We are going to cook the chicken first, and then it will just wait to be revisited until the end.  So, go ahead and cube your chicken.  When you are close to being finished, put your soup pot over medium high heat with about a tablespoon of olive oil in the bottom.  By the time you are finished, the oil should be hot, so add your chicken, as well as some salt and pepper, and let it brown.  When it is cooked, set it aside for later.

Step 2


Next, we will prep the veggies by dicing the onion, poblanos and Anaheim and mince the garlic.  Using the same pot, over medium heat, add another tablespoon of oil. 


Add the onion and peppers to the oil and sauté them for about 6 minutes, until they are softened.  Then add the garlic and let it cook with the veggies for 1 minute.  Add 1 teaspoon of salt and ½ teaspoon of pepper.

Step 3


Add the chicken stock, cumin, oregano, crushed red peppers and all BUT 1 cup of the beans (reserve 1 cup!).  Let the soup simmer for 10 – 12 minutes.

Step 4


Puree the soup using an immersion blender, blender or food processor.  The pureed beans will make it lovely and thick.  Return the pureed soup to the heat and let it simmer for another 10 minutes to let it reduce and thicken even more.

Step 5


Add the chicken, corn and reserved beans to the pot.  Taste and season accordingly.  Then let it simmer another 5 minutes to let the additional ingredients warm.


To serve, I like to top the chili with sour cream, shredded cheddar and scallions.

I honestly think this chili is even better the next day!  The beans make the soup more thick as it sits, so it is the perfect texture for me on day 2.  I love a dish that makes great leftovers! J

Here's to a day filled with beauty (and a hearty, warming dinner)!

Monday, January 16, 2012

Resolution Saving Touchdown Dips

Resolution Saving Touchdown Dips


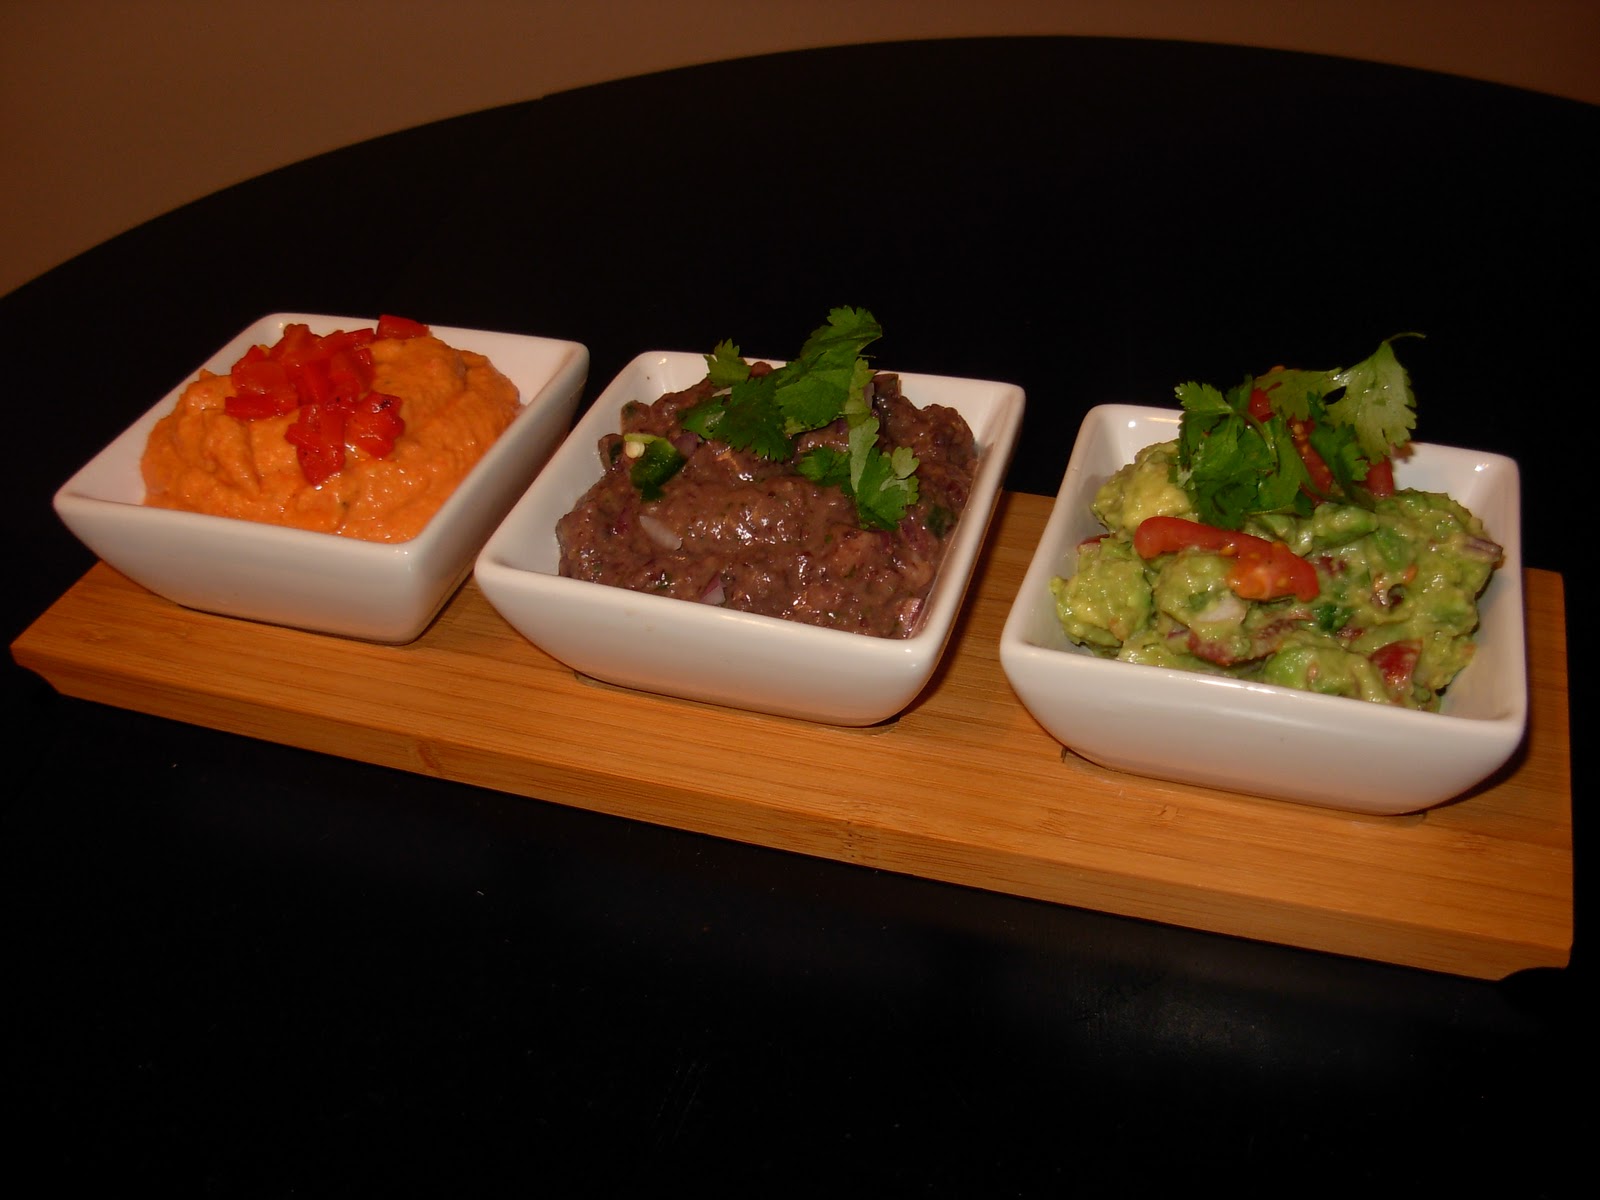
No good party, football themed or otherwise, is complete without at least one dip.  Well, that’s how I feel about it anyway.  I want something delicious to dip vegetables, tortilla chips and pita chips into throughout the event.  Dips are perfect for prolonged snacking…just put a little on your plate with some sort of dipper, eat, and repeat!  Unfortunately, most party dips are FULL of fat and high in calories – not exactly helpful in keeping to a New Year’s resolution.  In an attempt to help myself, and all of you, stay healthy throughout this New Year, I concocted this trio of dips.  They are perfect together or individually.  They are beautiful and tasty enough to use at a party, and simple and healthy enough to take with you in your lunch for work.  Just pack some vegetables and/or pita chips and you’ll be looking forward to that healthy packed lunch for once!  The hummus is also really good in a wrap or sandwich with some crunchy lettuce and tangy tomatoes. 

So don’t shy away from those playoff parties this year!  You can have your dip and be healthy too!

Dip #1

Roasted Red Pepper Hummus

Ingredients

4 Cloves garlic
2 (15 oz) Cans garbanzo beans (chick peas), liquid from one can reserved
1 ½ Teaspoons salt
1/3 Cup tahini paste
6 Tablespoons lemon juice
2 Tablespoons bean liquid
3 – 4 Teaspoons Frank’s hot sauce
3 Whole roasted red peppers, towel dried


Before we begin, I need to make sure you know about the tahini.  It is a sesame paste that is a classic ingredient in hummus.  You can actually find it in the ethnic (Mediterranean section) of most grocery stores.  It really makes hummus delicious, so pretty please…keep it in the dip! J

Step 1


This dip is so incredibly simple to make!  You just need the food processor and you are ready to go!  Throw your garlic cloves into the processor and process them until they are minced.  Then scrape the pieces down the sides of the food processor back to the base of the bowl.

Step 2


Add the drained garbanzo beans, salt, tahini, lemon juice, bean liquid, hot sauce and roasted red peppers.  Turn the machine on and let the ingredients blend until smooth. 


If it is too thick, add more of the bean liquid until the texture is just as you would like it.  Make sure you taste it and add more hot sauce or salt if your taste buds aren’t dancing!

To serve at a party, I just chopped some roasted red pepper and used it to garnish the dip.

It's that easy!!!  Now on to the next dip...

Dip #2

Black Bean Dip


Ingredients

1 (15 oz.) Can black beans, liquid reserved before rinsing the beans
Juice of 1 lime
¼ Medium red onion, small diced
1 Tablespoons cilantro
1 Teaspoon cumin
1 Jalapeno, small diced
1 Tablespoon, plus more if needed, bean liquid
2 Cloves garlic
½ Teaspoon salt

Step 1


The food processor makes this dip a snap too!  Place the garlic in the food processor and process until minced.

Step 2


Place the black beans, lime juice, cilantro, cumin, bean liquid and salt into the bowl with the garlic and process until it is smooth. 


Add more bean liquid if the dip is too thick.

Step 3

Small dice your red onion and jalapeno.  When it comes to the jalapeno, I removed most of the ribs and seeds, but left some for heat.  It is up to you how hot you would like it to be.  When you have finished, hand mix them into the dip.  I like the crunch of the onion and pepper with the creamy dip.

To serve this dip, I topped it with cilantro.

How easy have these dips been?!  Now on to the last...

Dip #3

Guacamole


Ingredients

3 Avocados
Juice of 2 limes
1 Teaspoon Frank’s hot sauce
¼ Red onion, diced
2 Cloves garlic, minced
1 Teaspoon salt
½ Dry pint grape tomatoes, cut into eighths
1 – 3 Teaspoons cilantro, chopped

First, put the food processor away!!!!  Guacamole should be delightfully chunky with creamy cubes of avocado, juicy bites of tomato and the pungent crunch of onion.  I don’t like it perfectly smooth…it says “I was made from a mix” and not, “I am fresh and delicious!”  Enough of my guacamole rant…let’s just make some…

Step 1

Chop the onion, tomatoes and cilantro and mince the garlic.  Put them into a container or bowl.  Add the juice of 1 of the limes and hot sauce.

Step 2


Now it’s a race against the clock with the avocados.  They brown when they are exposed to the air, but the acid in the lime juice helps to prevent this.  Cut your avocados in half long ways and remove the pits.  Use a large spoon to scoop all the flesh from the skin.  Then large dice the avocado.  Add the pieces to the bowl and squeeze the remaining lime on top of the avocados.  Then sprinkle the salt on top.

Step 3

Mix all of the guacamole together. 


Grab a potato masher like this one (or just use a fork if you don’t have one) and mash the mixture until it is creamy with large chunks of avocado throughout. 


Taste to see if there is enough salt, cilantro (I use a little bit because I am sensitive to large amounts of cilantro) and hot sauce for you.

To serve, I garnished with some extra cilantro and some small diced tomato.

(Guacamole is best served immediately.  If you are storing it, keep it in an air tight container, with plastic wrap pressed directly on top of the guacamole before placing the lid on top.)


These dips are all wonderful.  I was trying to select my favorite.  Each time I thought I had a choice, I tasted another one and that went out the window!  Make one, make all, it's up to you!  But enjoy these simple, flavorful and healthful dips this winter!

Wednesday, January 11, 2012

Meatloaf Parmesan

Meatloaf Parmesan


“Meatloaf”  There are very few more unappetizing food names in the English language than “meatloaf.”  A loaf of meat.  Sounds weird and completely unappetizing.  I wish we could rename it…let’s try and see if it catches on!  How about “pain de viande” – the French name for meatloaf.  Everything sounds better in French, doesn’t it?  Join me in my crusade to turn meatloaf into something beautiful and elegant!

Honestly, I think meatloaf gets a bum rap because of the dry, tasteless loafs of meat we have all experienced a number of times throughout life (cafeteria meatloaf, anyone?).  They can also be the other extreme…so heavy and greasy that you can hardly even eat it.  I have found though, that there are variations of meatloaf out there in recipe land, that are completely worthy of passing over my lips and are actually even worthy of sharing with company!  This meatloaf variation is rooted in a recipe I received at my bridal shower.  I have no idea who gave it to me, but we absolutely love it!  I’ve shared the recipe with others too who have raved about the flavors.  So thank you to my mystery recipe donor.  I am now sharing your recipe with the world (or my little section of it)!

Keep in mind, meatloaf can be lightened and still kept delicious by mixing your meats.  I usually make it with half ground turkey breast (often marked “99% fat free” at the grocery store) and half ground beef.  This reduces the fat significantly, while still maintaining the flavor and juiciness of a good meatloaf.

Here it goes…Pain de Viande Parmesan:

Ingredients
1 ½ Pounds ground meat (beef, turkey, chicken, pork or any combination)
½ Cup Bread crumbs
½ Cup onion, diced
1 Egg
2 Cloves garlic, minced
1 ½ Teaspoons Italian seasoning blend
1 Teaspoon salt
1/8 Teaspoon pepper
¼ Cup Parmesan
1 ½ Cups spaghetti sauce (a little more if using a lean ground meat)

Step 1
Preheat the oven to 350 degrees.  Then the first step, as usual, is to prep your ingredients.  You need to dice the onion and mince the garlic.  If you are using fresh Parmesan cheese, you will want to grate that awhile too.

Step 2


Combine the ground meat, bread crumbs, onion, egg, garlic, Italian seasoning, salt, pepper, 2 Tablespoons Parmesan and ½ cup spaghetti sauce (a little more for moisture if using lean meat).  Mix them by hand until they are just combined…you don’t want to over work your meat or it will get tough. 


When the ingredients seem equally distributed throughout the meat, form it into a loaf in a shallow baking dish and bake the pain de viande for 45 minutes.

Step 3


Bring your pain de viande out of the oven and drain any excess fat you might have in the dish.  Then spread the remaining spaghetti sauce on top of the loaf.  Top the sauce with the remaining Parmesan cheese.  Bake it for another 15 – 20 minutes.  Then let it sit for a few minutes before cutting, so all the juices can redistribute through the meat.


Enjoy the pain de viande!

I promise, truly healthy recipes are coming.  But by using lighter ground meats, you can turn pain de viande into a tasty, lean protein dinner!

Monday, January 2, 2012

Salmon with Dill Butter

Salmon with Dill Butter


Happy New Year to all of you!  I hope your Christmas season was full of love and cheer and 2012 is welcoming you with open arms.  Tim and I were both off work last week; we had a lovely week with family, friends and lots of time for relaxation.  My sister came over one of the evenings and we had an Italian themed food and movie night.  Pictures and recipes will be coming soon, but the evening was a blast!  I hope food is fun for you in this New Year.  I know I am excited to create more healthful and delicious recipes now that the holiday season is over and we begin anew.  My first recipe for 2012 should be incredibly light and healthy…this is not what I expected to post with all the butter.  But it is delicious and full of those necessary Omega 3s…and it is incredibly quick to put together!  It is also written for two servings for all those friends out there cooking for two. 

The flavors in this salmon dish work together so perfectly.  Salmon has a heavier, fattier feel when no effort is made to counteract it.  By using this butter mixture, full of acids from lemon and mustard, that fattier feel is lightened and the salmon becomes something bright and lovely.  Paired with a steamed green vegetable, this salmon does become a healthful meal.  The power punch of the Omegas 3s will help you begin 2012 on the right foot!

Ingredients
2 Salmon fillets
4 Tablespoons butter, softened
2 Tablespoons fresh dill, chopped
2 Tablespoons whole grain mustard
1 ½ Teaspoons lemon juice
½ Teaspoon salt
¼ Teaspoon pepper

Step 1

There are soooo many steps to this recipe, you might want to make yourself a latte and brace yourself for this process…did you do it?  Are you ready?  Here we go! 


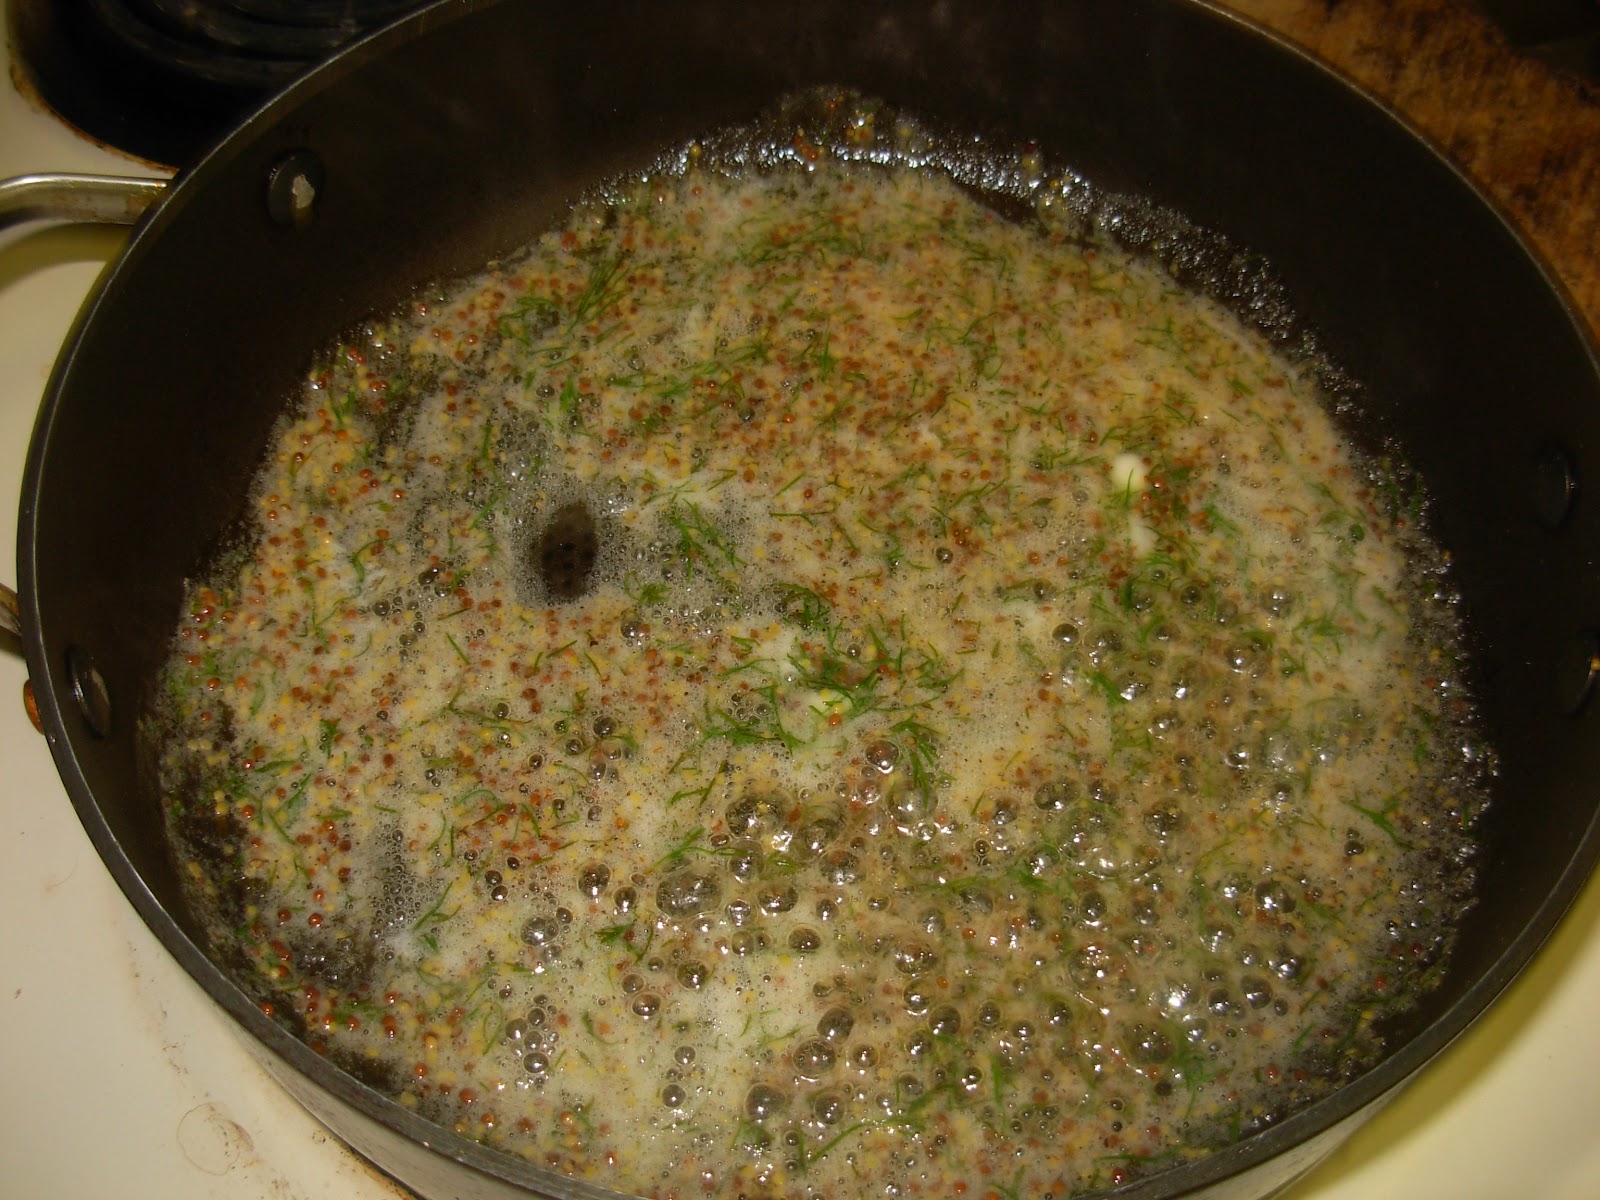
Combine the butter, chopped fresh dill, whole grain mustard, lemon juice, salt and pepper. 


Whew!  Finally Step 1 is over...on to 2...

Step 2


Heat a sauté pan over medium-high heat.  Add about 3 tablespoons of the butter mixture and allow it to melt. 


When it does, add the salmon fillets.  Let them sauté for about 4 minutes on each side (they are easily flaked when they are finished).  Remove the salmon from the pan and top each fillet with a dollop (I just love that word!) of the butter mixture.  It will begin to melt down the fillet and look beautiful and inviting on your plate.


That’s it!!!  I admit it, I lied about the large quantity of steps.  I really just wanted you to make yourself a latte.  You deserve it!  Pamper yourself a little each day.  THAT should be your resolution this year.  Just sayin’…


Gastronome's Note:  You will have leftover butter.  Add some to your vegetables or save it to use again!

Saturday, December 17, 2011

Cranberry Bliss Bars

Cranberry Bliss Bars


Have you ever stared through the glass case at Starbucks, longing after those luscious cranberry covered beauties, while thinking, “I’m already spending $5.00 (not to mention the calories!) on my coffee...”, so you passed over them while they called your name, beckoning you to return?  I know I have.  I am so proud of myself every time I ignore those crimson jeweled triangles as they whisper, “Chelsea, Chelsea”.  But I could resist no longer.  This year I had to cave.  So instead of giving into the tart and tantalizing triangles behind the Starbucks case, I made some of my very own!  Now I can have them with my coffee every day (perhaps I should have told people a size larger when I mentioned clothing for Christmas…)!  If you love cranberries, please make these.  I promise they will make your mouth sing and your soul feel glad this Christmas season.  I found the blondie recipe from Taste of Home.  I appologize I do not have any process pictures; I was slacking...but here is what I did to construct this delectable Christmas treat:

Ingredients

Blondies
¾ Cup butter
1 ½ Cups light brown sugar, packed
2 Eggs
¾ Teaspoon vanilla
2 ¼ Cups flour
1 ½ Teaspoons baking powder
¼ Teaspoon salt
1/8 Teaspoon cinnamon
½ Cup dried cranberries, roughly chopped
6 Ounces white chocolate chips

Frosting
4 Ounces butter, softened
4 Ounces cream cheese, softened
2 Cups powdered sugar
1 Teaspoon vanilla

Topping
½ Cup dried cranberries, roughly chopped
4 – 5 Ounces white chocolate chips
Zest from 1 orange

Step 1
Preheat the oven to 350 degrees.  Prepare a 9 x 13 pan by spraying with cooking spray.  I also put parchment paper into the pan, cut large so that it hung off the sides, so I could remove the blondie bar from the pan easily when it had cooled.  Just press it against the spray so it sticks to the pan, and then spray the top of the parchment for good measure. J

Step 2
Melt the butter for the blondies and combine it with the brown sugar.  Allow it to cool enough that it won’t scramble your eggs.  Then add the eggs and vanilla and let them combine with the butter mixture.  Then add the flour, baking powder, salt and cinnamon and mix until they are just combined.  Then add the cranberries and chocolate.

Step 3
Spread the batter in your pan and bake the blondies for 18 – 22 minutes (mine took closer to 22), or until a toothpick inserted in the center comes out clean.  Let them cool on a wire rack, OR, if you are like me and are utterly impatient, throw them in the fridge to cool for awhile!  But don’t be like me.  Patience is a virtue, don’tcha know?

Step 4
Prepare the frosting by beating the cream cheese and butter together.  Then add the powdered sugar and mix until it is creamy.  Then add the vanilla.

Step 5
Remove the blondies from the pan if you want to be fancy, or just leave them in the pan.  Either way, go ahead and frost them!  Then sprinkle the ½ cup of chopped cranberries on top.

Step 6
Using a double boiler, and making sure the boiling water does not touch the bottom of your chocolate bowl or pan, melt the white chocolate with the orange zest.  When it has melted, drizzle it on top of your blondies.  When the chocolate has cooled, you can slice the blondies into rectangles, triangles…or heck…just eat the whole pan!  They are THAT GOOD! J


Merry Christmas, my fellow foodies!

Monday, December 5, 2011

Black Bean Soup

Black Bean Soup


It’s December!  Where has 2011 gone?  It feels like just a couple months ago we were celebrating Independence Day with hot dogs and fireworks, but here we are…in the throes of Christmas preparations (and I’m loving every minute of it!).  After the delicious, but oh-so-un-waist-friendly Thanksgiving festivities and in between the thigh dwelling Christmas cookies, I decided dinner should be something healthful yet hearty.  I absolutely love Panera’s black bean soup and decided to create a knock-off of it to provide a flavorful, filling and low calorie dinner option!  Boy was it a success!  Lots of flavor, while fantastically low calorie.  Served with some baguette slices and a salad, you’ve got yourself a meal!

Ingredients
Olive oil
2 Onions, chopped
¾ Cup carrot, chopped
2 Ribs celery, chopped
1 Poblano, seeds removed and chopped
8 Cloves garlic, minced
4 Teaspoons cumin
2 Jalapenos, chopped – seeds removed if you don’t want the heat
4 15-to-16 oz. cans black beans, undrained
2 15-oz. cans petite diced tomatoes in juice
3 Cups low sodium chicken stock
2 Tablespoons cilantro, plus more for garnish

Step 1


This recipe begins as most of my recipes do, with vegetable prep!  Go ahead and chop the onions, carrot, celery, poblano, garlic and jalapenos. 


When it came to the jalapenos, I decided to remove the seeds from one and not from the other.  I like some heat, but not too much.  But you can do whatever your little heart desires!  Oh, and while you’re at it, you might as well chop the cilantro for later too.

Step 2


Heat about 3 tablespoons of olive oil in a large pot over medium-high heat.  Add the onion, carrot, poblano and celery.  Sauté the vegetables for about 6 minutes, or until they begin to soften.  Then add the garlic and sauté for 1 minute.  Mix in the cumin and jalapenos. 


Then add the beans, tomatoes and stock and bring the soup to a boil.  When it boils, reduce the heat to medium and cover for about 15 minutes, or until the carrots are softened.  Add the cilantro.

Step 3


Remove the soup from and heat.  Take about 5 cups of beans and vegetables from the soup (it's okay to get some of the liquid too) and set aside.  Then use an immersion blender, blender or food processor to puree the rest of the soup until it is smooth. 


Combine the puree and whole vegetables in the pot again and simmer another 15 minutes, uncovered.  Season with salt to taste and serve with a cilantro garnish.


Enjoy!  Happy shopping and cookie baking!